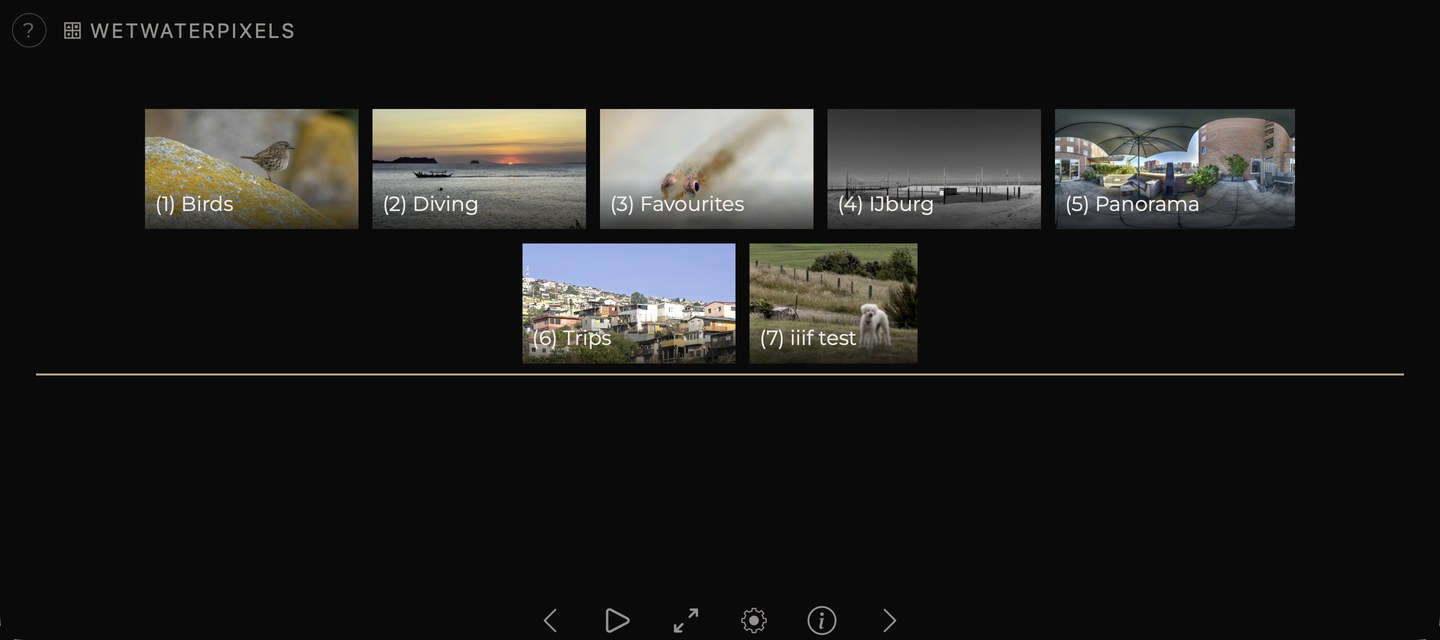
 Figure 1: main screen
Created from a personal need to share photos without any distractions or dependencies on private platforms.
Photos First.
Figure 1: main screen
The screen has three parts.
A top bar. At the far left, a ?
opens a summary of the keys and gestures see The help panel. Next to it, a button
showing a grid icon and the name of the current album; a click on it
moves one level up, to the album containing this one. When a photo is
open, the centre and right of the bar show the photo's title / subtitle,
the date it was taken, and a counter such as 7/42. Long
names are shortened with … rather than wrapping onto a second line.
The middle. The gallery itself. Albums appear as large tiles, with the photos belonging directly to the current album shown below them as thumbnails. An open photo occupies the entire middle section.
A bottom button bar.
| Button | Function |
|---|---|
| ‹ | previous photo |
| ▶ | start the slideshow |
| ❚❚ | stop the slideshow (shown while one is running) |
| ⤢ | full screen on or off |
| ⚙ | settings |
| ? | keys and gestures (on a phone or tablet; on a larger screen this sits at the top left) |
| ✏ | edit this album or photo (signed in only) |
| ⓘ | show or hide information |
| › | next photo |
 Figure 2: button bar
Albums hold photos, and may contain other albums. The "Travel" album might hold "Norway 2023" and "Portugal 2024", which hold photos and potentially further albums.
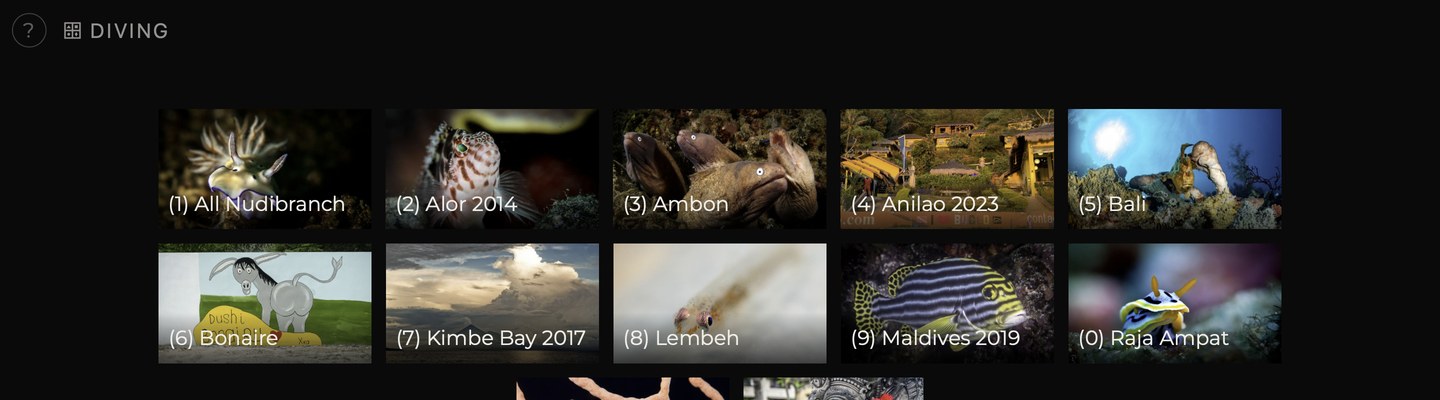 Figure 3: album tiles
Below the album tiles, after a dividing line, are thumbnails of the photos belonging to the selected album, after a heading with the album's name.
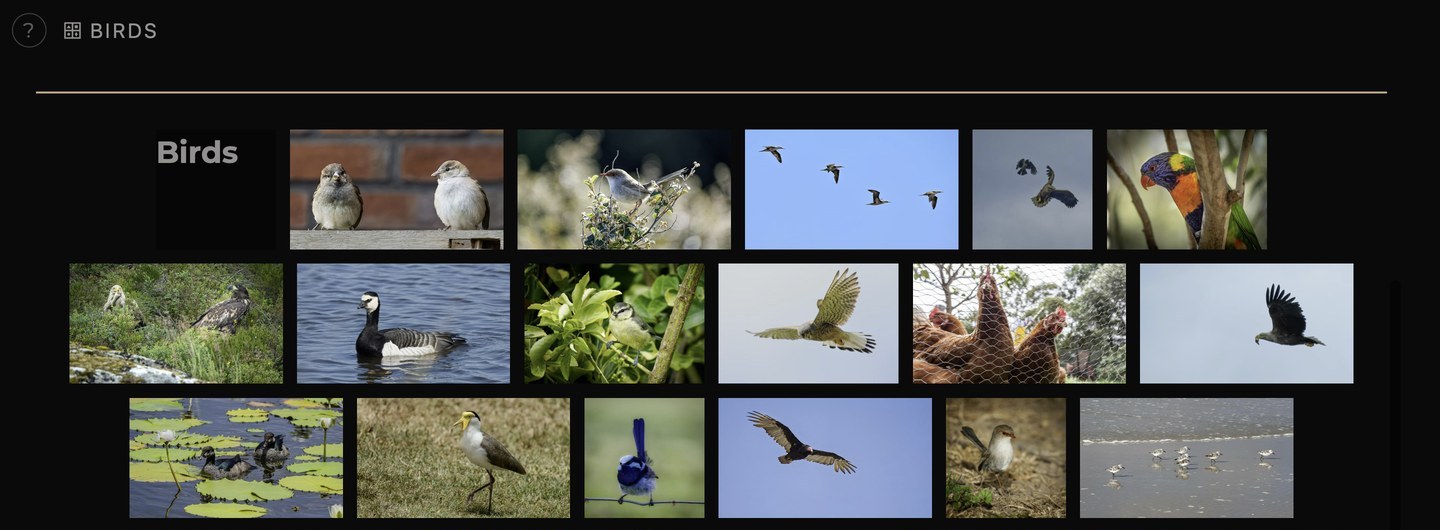 Figure 4:
thumbnail grid
Figure 4:
thumbnail grid
Photos in an ordinary album appear in a different order on each visit by default. Albums marked as a trip hold photos in the order they were taken, earliest first. The order can be set per album with photo order in the album edit panel see Editing an album.
Click or tap a thumbnail to open the photo at full size.
The next photo is loaded in the background while the current one is on screen, so paging through remains responsive. After the last photo the sequence returns to the first.
Large screens receive the full-size version of each photo, smaller screens a smaller one, which also loads faster on slow connections.
There is support for video, iiif images and 360° panorama's. These open in appropriate viewers.
Panoramas. A full-surround 360° image. Opens in a viewer that can be turned by dragging with the mouse or a finger. On a phone or tablet the handset itself can be moved to look around; permission for the motion sensor is requested the first time. Each panorama starts slightly randomised in panning speed and starting position.
Video. A video clip starts playing when it comes into view and stops when another photo is selected.
Ultra high-res. Support for very high resolution images in IIIF format. These open in a viewer that supports zooming and panning: scroll or pinch to magnify, drag to move around. The viewer is fetched the first time such an image is opened, so that first one takes a moment longer.
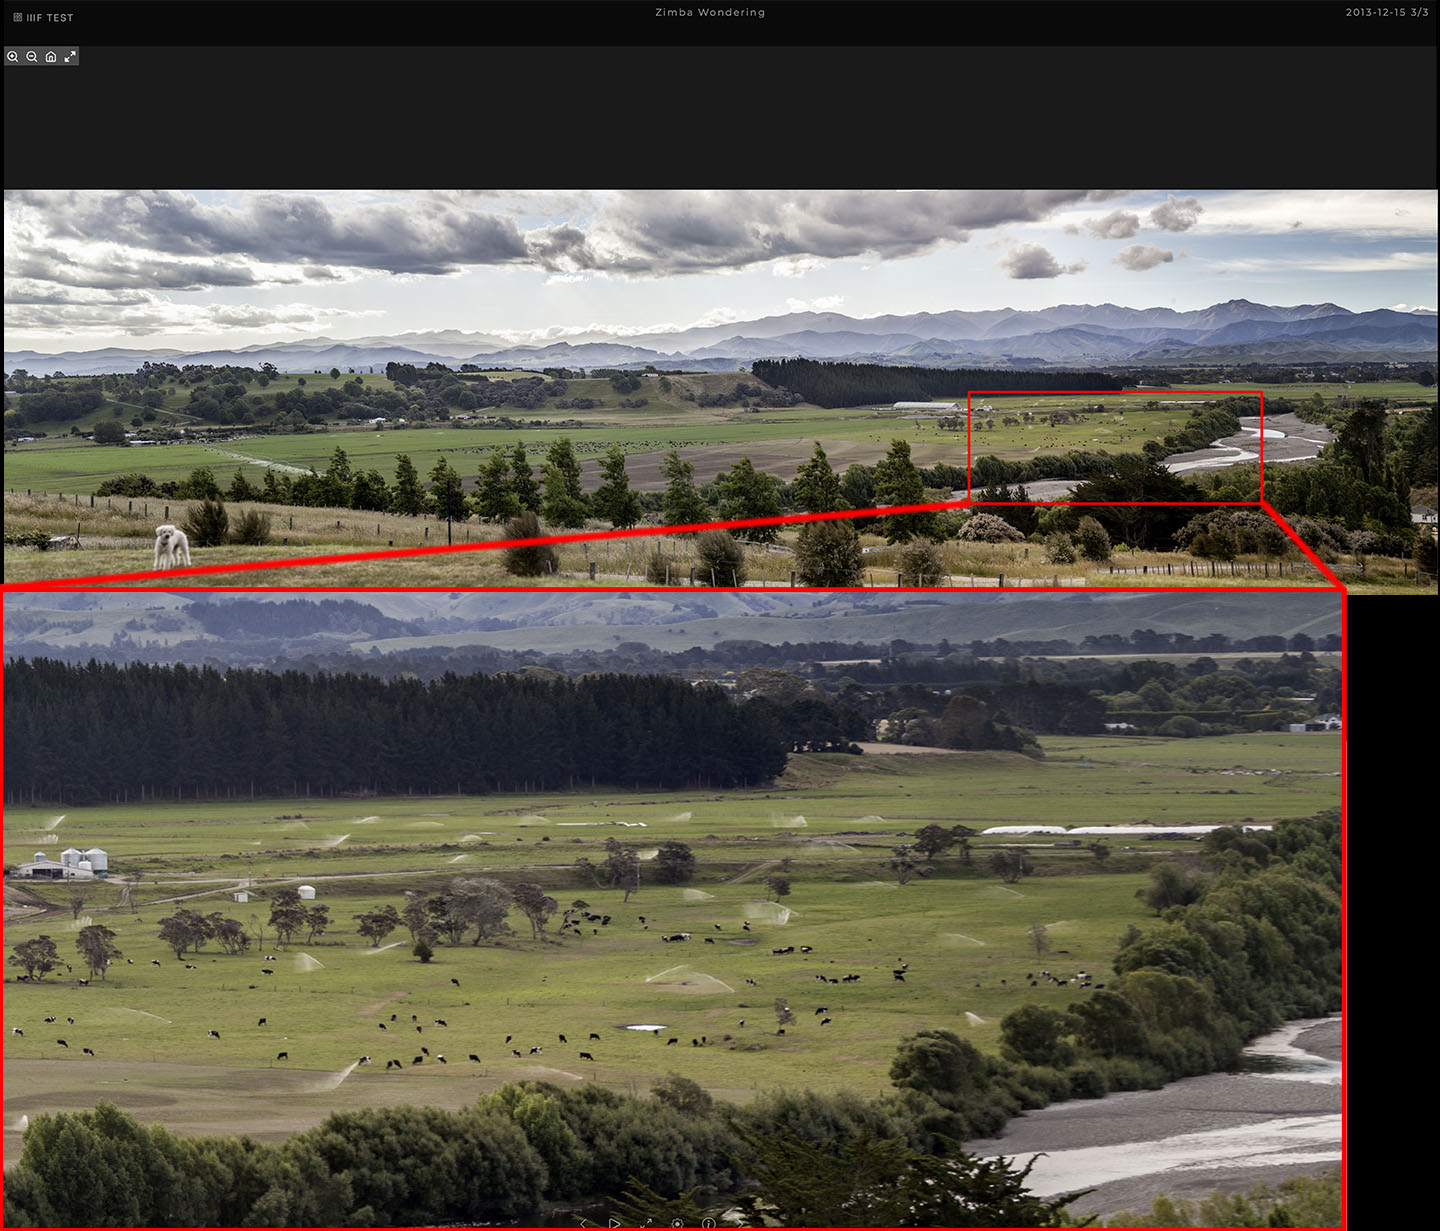 Figure 5: iiif
image
Figure 5: iiif
image
On a phone, the ‹ and › buttons remain visible for panoramas and deep-zoom images, since a swipe there turns or pans the view rather than advancing to the next photo.
The ⓘ button, or the i key, shows the details behind the current album or photo.
For an album: the album's info picture, the number of photos, the location, the description, and the range of dates over which the photos were taken. For a trip, the dates of the trip.
For a photo: title, subtitle, location, date taken and description, alongside the camera details body, lens, focal length, aperture, shutter speed and ISO. The camera details can be hidden for the whole gallery with show camera info in the settings.
Where the photo carries coordinates, a show on map link opens a map in a new window at the position of the photo.
When signed in, the photo panel also shows the photo's number, whether it has an HDR gain map, and whether it is marked as a candidate cover image.
Pressing ⓘ again closes the panel.
The ? at the top left of the screen, in the button bar on a phone or tablet, or the ? key summarises everything the gallery responds to: the keys, the gestures, and the editing shortcuts. It appears below the top bar and closes again on any key, tap or click.
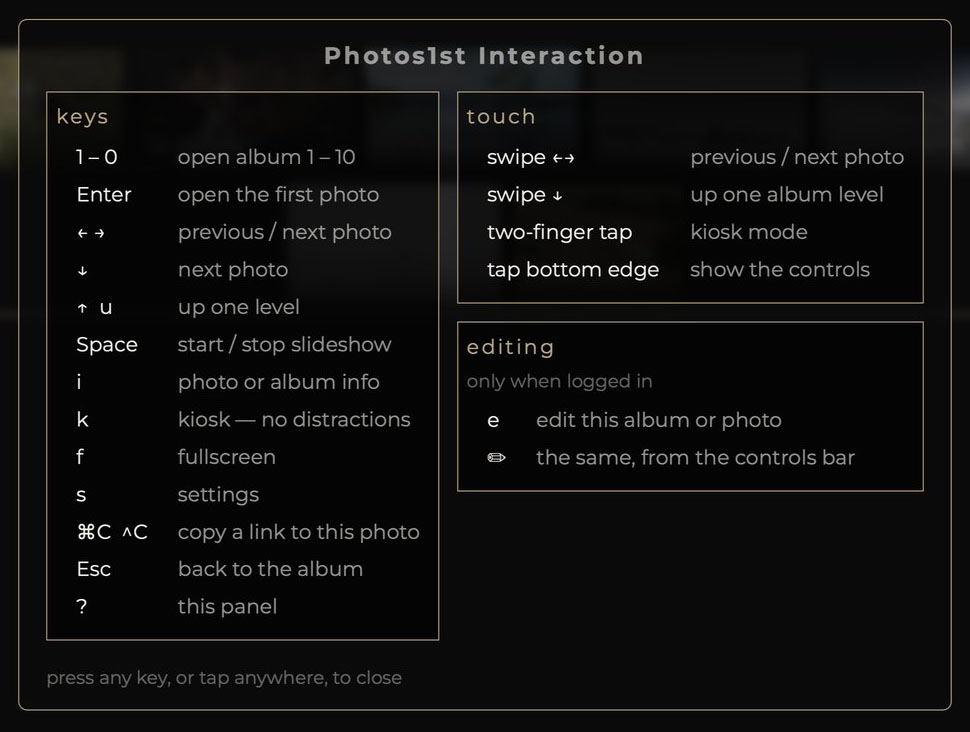 Figure 6: The help panel.
The ▶ button, or the space bar, starts a slideshow. A thin bar along the bottom of the screen indicates the time remaining on the current photo.
Full screen the ⤢ button or the f key removes the browser interface, leaving only the photos. The same button, or Escape, restores it.
The kiosk view the k key hides the top bar and the button bar, leaving nothing around the photo. The arrow keys and the slideshow continue to work. Pressing k again restores the bars.
Used together, the two produce a clean display suitable for a large screen, a presentation or an exhibition.
The ⚙ button, or the s key, opens the settings window. It is divided into sections; site appears only when signed in.
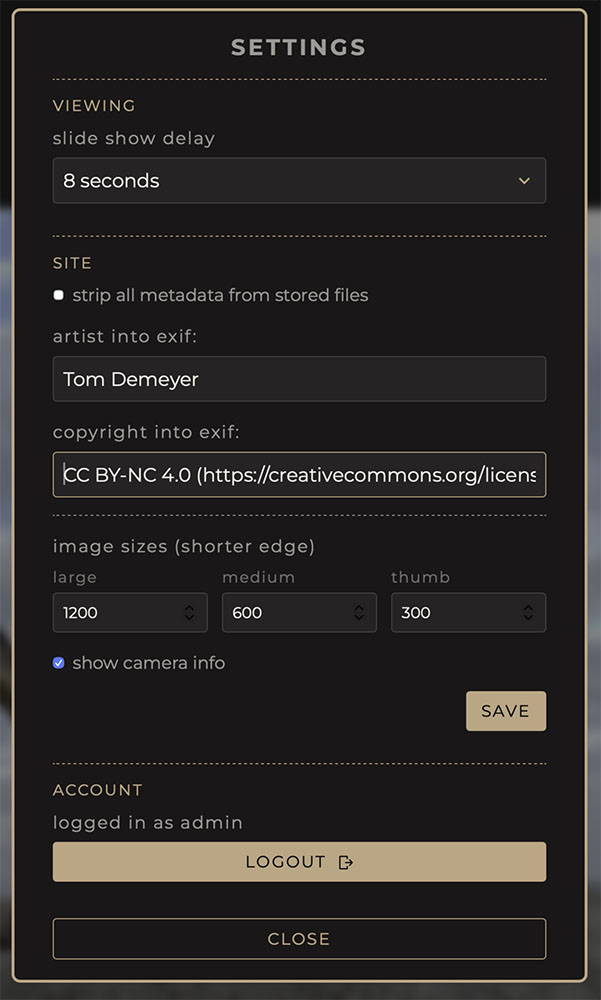 Figure 7: settings window, signed in.
Viewing slide show delay. A list with 4, 8 and 15 seconds, half a minute, etc. A new choice applies at once, also to a slideshow that is already running. It is stored on the device and applies to subsequent visits.
Site section (signed in only). Settings for the whole gallery, these are stored on the server:
| Field | Purpose |
|---|---|
| strip all metadata from stored files | on removes all information carried in the stored versions of new uploads (camera and exposure details, date, coordinates and so on) except the artist and copyright. The colour profile and any HDR gain map are kept. The gallery still reads the details from the upload first, so they remain available in the info panel |
| artist into exif | a name written into every newly uploaded photo as its artist. Leave empty to keep whatever the photo file itself says |
| copyright into exif | likewise for the copyright notice, for instance a licence such as
CC BY-NC 4.0 |
| image sizes (shorter edge) | the size in pixels of the shorter side of the large, medium and thumb versions made of each upload a landscape photo at 1200 becomes, for instance, 1800 × 1200: whole numbers from 50 to 8000, with large ≥ medium ≥ thumb |
| show camera info | on shows the camera details in the photo info panel; off hides them for everyone. Takes effect at once, for all photos |
save stores changes, a reason they could not be saved appears beside the button. Stripping, credits and sizes apply to photos uploaded from then on; photos already in the gallery keep what they were made with.
Account. Signed out: admin login, the password field see Signing in. Signed in: logout.
close dismisses the window, as does Escape.
The gallery can be operated entirely from the keyboard. These keys are active except while typing into a field.
| Key | Function |
|---|---|
| → or ↓ | next photo |
| ← | previous photo |
| ↑ or u | move up to the album above, or close the photo |
| Enter | open the first photo in the album |
| Escape | close any window and return to the overview |
| space | start or stop the slideshow |
| i | show or hide information |
| f | full screen on or off |
| k | bare view on or off |
| s | settings |
| e | open or close the edit panel (signed in only) |
| ? | the keys and gestures summary |
| 1–9, 0 | open the album with that number |
| ⌘C / Ctrl-C | copy a link to the photo on screen (when no text is selected) see Sending someone a link |
The address in the browser's address bar follows the current position in the gallery. Copying and sending it brings the recipient to the same album.
To share one particular photo, open it and press ⌘C (Ctrl-C on
Windows and Linux). This copies an address of the form
…/collections/12/photo/345, which opens the album with that
photo on screen. When the album was opened with a secret link, the
secret is included, so the recipient can see it too.
Instructions may be appended to the address, after a question mark:
| Appended to the address | Effect |
|---|---|
?slideshow=10 |
the album opens and begins a slideshow at 10 seconds a photo |
?kiosk |
the album opens without the top bar and button bar |
?secret=yourcode |
opens a hidden album see Who can see what |
Instructions combine with & between them, for
example ?kiosk&slideshow=15. A single address of this
form is sufficient to drive an unattended display in a waiting room or
at an exhibition.
The remaining sections concern the upkeep of the gallery: creating albums, adding photos and maintaining their details. All of it requires signing in.
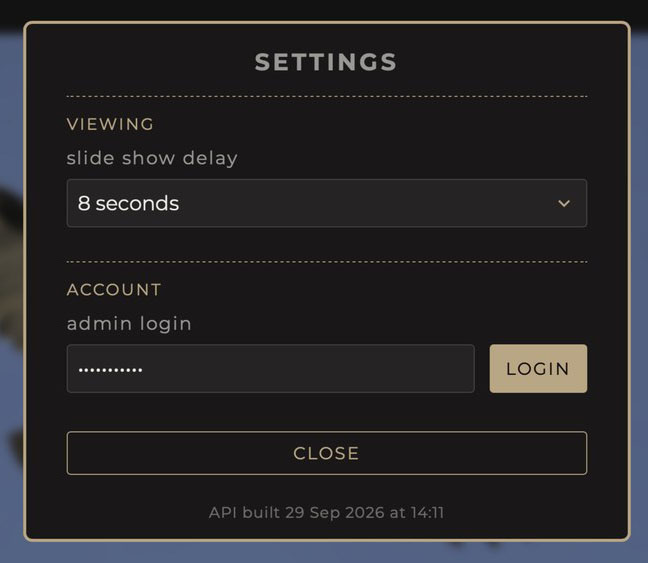 Figure 8: signing in.
The page reloads, and albums and photos hidden from ordinary visitors become visible. The settings window then shows the site section and a logout button. A wrong password simply leaves you signed out.
The sign-in lasts a week on that device; after that, sign in again.
The signed-in state persists on the device until logout, so log out on shared or public computers.
Open the album and press e, or use the ✏ button in the button bar. The edit panel opens below the top bar.
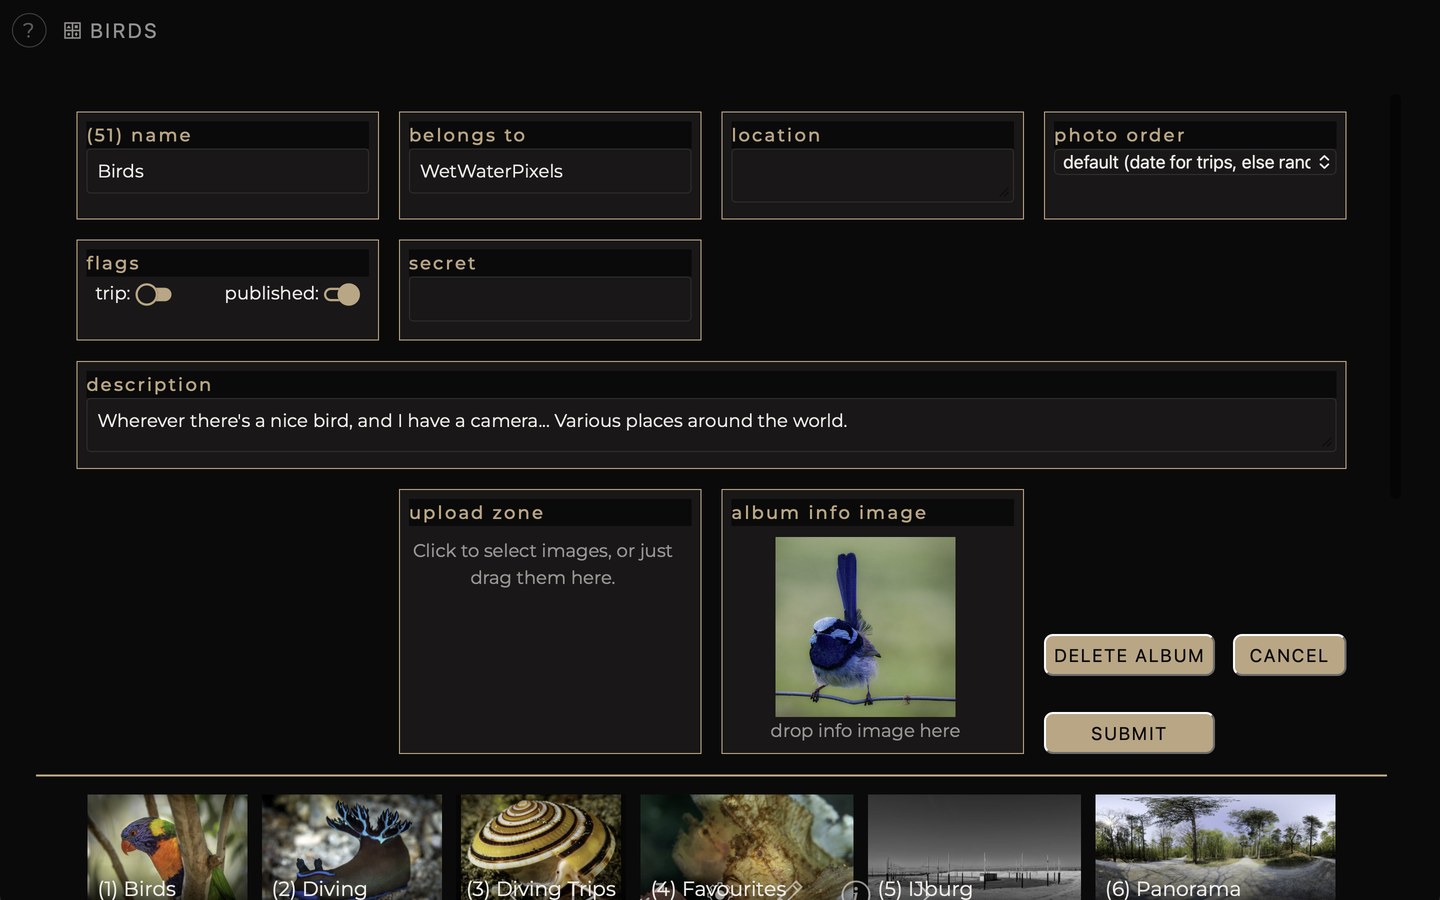 Figure 9: album edit panel.
| Field | Purpose |
|---|---|
| name | the album's name, as shown beneath its tile |
| belongs to | the album this one sits inside. Type the first few letters and select from the list |
| location | the place or region, shown in the info panel |
| date | the dates of the trip; present only when trip is on |
| photo order | how the album's photos are ordered: default (by date for a trip, otherwise shuffled on each visit), fully random, date/time taken, or alphabetically by title, subtitle or location. Photos without a value sort last |
| flags | two switches, described below |
| secret | a secret word permitting access to an unpublished album |
| description | free markdown text about the album |
| Upload Zone | where photos are added see the next section |
| Album Info Image | the picture at the top of the info panel |
Jun 2024 / Jul 2024. A
single month is sufficient where the range is one month:
Sep 2023 is equivalent to
Sep 2023 / Sep 2023.Formatting the description. The description field accepts markdown formatting
Markdown text is replaced by the formatted text it describes; plain text is equally acceptable.
The buttons at the foot of the panel:
The info picture is replaced by dragging an image onto the Album Info Image box JPG, PNG or AVIF. A preview appears immediately; submit commits it.
Open the album's edit panel with e, or the ✏ button, and use the Upload Zone box.
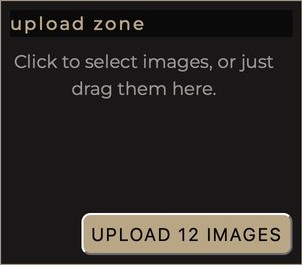 Figure 10: The upload zone.
Either drag the photos from the desktop onto the box, which highlights as they pass over it, or click the box and select them several at once if required in the window that opens.
A button in the corner of the box then reads upload 12 images, or the appropriate count. Pressing it sends the photos; pressing submit sends them together with the rest of the changes.
The photos are sent one at a time; the button counts down (uploading… 7 to go). When the last one is done, the album reloads by itself and the new photos appear. Photos that could not be processed are listed together in one message at the end, with the reason for each.
Accepted formats: JPG and AVIF, with or without gain map. Other files are refused.
Each photo is prepared in three sizes, and its camera details and coordinates, where present, are read from the file. Section 17 describes this processing in detail.
Open the photo and press e, or use the ✏ button in the button bar.
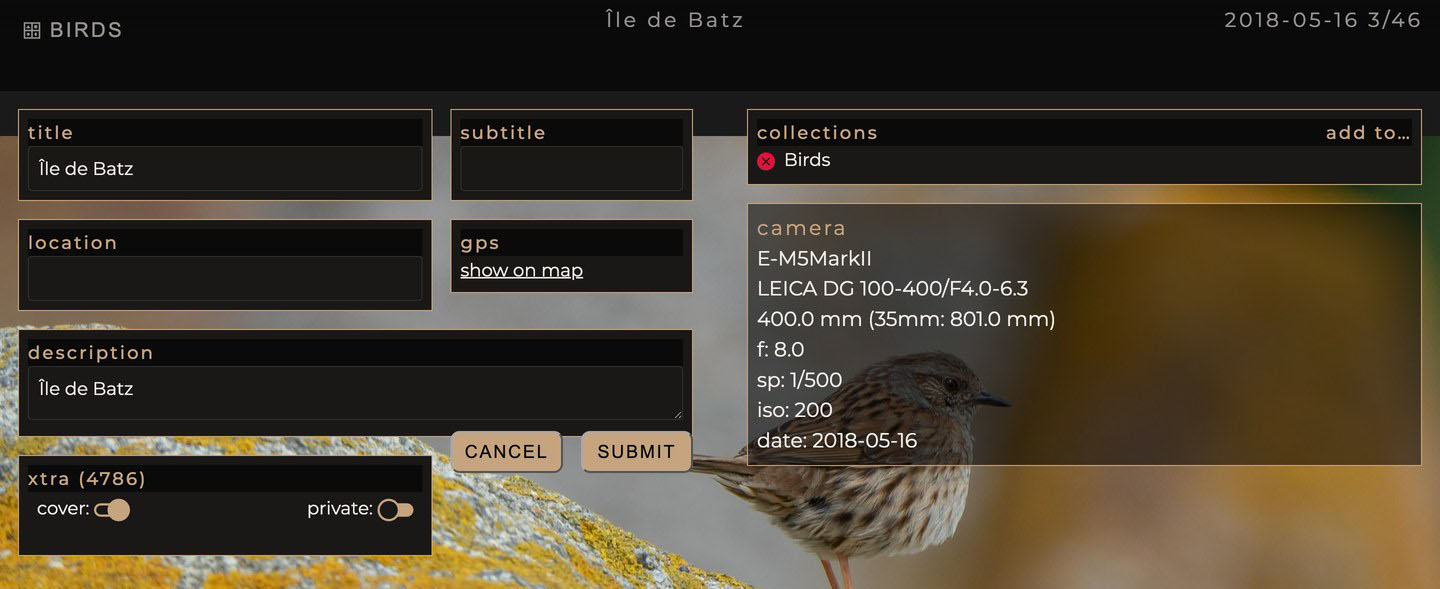 Figure 11: photo edit panel.
Left-hand side:
| Field | Purpose |
|---|---|
| title | the title, shown in the top bar |
| subtitle | a second line below the title. For a panorama or a film this field is labelled differently and holds the name of the associated file; leave it unchanged |
| location | where the photo was taken |
| GPS | reference only; show on map opens the map |
| description | free text, using the same formatting marks as an album description |
| cover | on permits this photo to serve as the sample picture on the album tile. Where none are marked, the gallery selects one itself. A cover that is also private is only used while signed in |
| private | on hides the photo from ordinary visitors |
Right-hand side:
At the foot of the panel, cancel discards changes and submit saves them.
Deleting a photo. Strike through every album the photo belongs to and press submit. The gallery asks for confirmation, then deletes the photo for good, files included, and returns to the album. Cancelling leaves everything as it was.
Three options determine what a visitor is shown.
published, on an album. On, the album is public and reachable by any visitor. Off, it is absent from every listing and cannot be reached by guessing.
secret, on an album. This shares an unpublished
album with a defined group. Set a secret word wedding2024,
for instance and distribute the album's address with
?secret=wedding2024 appended. That link grants access while
published remains off; without it, nothing is visible. Also
gives access to private photos within the album.
private, on a photo. For an individual photo that should not be shown in a public album. It is withheld from ordinary visitors and never shown to them. It remains visible while signed in and, inside the album, for people holding the album secret.
| Situation | Ordinary visitor | Visitor with the secret link | Signed in |
|---|---|---|---|
| album published on | sees the album | sees the album | sees the album |
| album published off, secret word set | sees nothing | sees the album | sees the album |
| photo with private on | does not see the photo | sees the photo | sees the photo |
An uploaded photo passes through several steps before it appears in the gallery.
The following exif data is read out and applied:
| Field filled in | Source |
|---|---|
| title | the title field, or the caption where no title is present |
| subtitle | the part of the title following a semicolon |
| description | the caption |
| location | the comment field |
| camera, lens, focal length, aperture, shutter speed, ISO | the exposure settings |
| coordinates | the position recorded by the camera or phone |
| date taken | the date of the exposure |
| dive data | dive data read from dive log and stored in 'userdata' exif |
The semicolon convention allows both lines to be set from one field:
a title of Great Tit; Parus major yields "Great Tit" as the
title and "Parus major" as the subtitle. Everything imported this way
can be amended afterwards in the photo's edit panel.
When a file carries no date, the photo is assigned one in the distant past the year 1413 which makes photos lacking a date straightforward to identify.
Each photo is prepared in three versions: large, medium and small (thumb), all in the AVIF format irrespective of what was uploaded. The gallery selects between them automatically small for thumbnails, medium for phones and small windows, large for full-size screens. Their sizes are set in the settings window. A photo smaller than a requested size is kept at its own size rather than enlarged.
Photos that carry an HDR gain map keep it in all three versions, and are shown in high dynamic range on screens and in browsers that support it.
Certain files are stored exactly as supplied rather than resized; they are only used as thumbnails.
Panoramas, video clips and iiif images are uploaded separately (for now). What is uploaded through the gallery is a stand-in image a still from the video, an overview of the panorama, a fixed view of the iiif; the literal filename of this image is what determines the type on the server:
| Name of the uploaded file | Resulting type |
|---|---|
pano.jpg |
panorama |
video.jpg |
film |
iiif.jpg |
iiif image |
Afterwards, open the photo, press e, and enter the name of the associated panorama directory, video file or iiif folder in the second field labelled pano dir, video file or subtitle accordingly.
The Album Info Image is handled separately: it is cropped to a square from the centre, and all information in the file is cleared except the photographer's name and the copyright notice it carried.
Resizing and reading take a moment per photo; can be an appreciable amount for fifty. Photos are processed one after another as they arrive; the upload button shows how many are still to go, and the album refreshes when all are done.
Image sizes, the artist and copyright credit, stripping and camera info are changed in the settings window while signed in. The server's settings file only supplies their starting values, when the gallery is first started. The rest is held in that settings file and adjusted by whoever administers the server.
| Parameter | Where | Effect |
|---|---|---|
| large, medium, thumb | settings window | shorter edge in pixels of each version |
| artist, copyright | settings window | written into every new upload |
| strip all metadata | settings window | new uploads keep only artist and copyright |
| show camera info | settings window | camera details in the photo info panel, for everyone |
| administrator password | server settings file | the sign-in secret |
| storage locations | server settings file | where photos, films and panoramas are held |